Product: M3i ZeroForm factor: Slot 1
Web site: http://www.m3adapter.com/Introduction.The long awaited M3i Zero has landed. A card that has been hugely anticipated amongst the homebrew scene due to its feature set. Not only is the hardware completed upgradeable from the kernel,boot flash and firmware, but the OS supports the much trumpeted M3 Sakura. Once only available to the Japanese. Now translated for the western market.
Last December when I was reviewing the M3 Real, I commented on the power of the hacked triple loader OS. This gave the end user many options, enough to suit the various needs of any DS homebrew enthusiast. I'm please to see these comments have been taken on board by Team M3. The M3i is the first available retail card that supports a Dual Boot system as standard. You can switch between TouchPod and Sakura by simply pressing down the A button on boot.
Anyway, enough with the blarney. Let's see what's under the hood of the new M3i Zero.
What's Inside the Box.The M3i Zero comes in a glossy dark blue retail box emblazoned with the M3 logo and url. The back of the box describes the feature set of the card and also includes a pictorial representation of the contents of the Box. The packaging size, shape and overall finish, is exactly like the previous M3 Real.
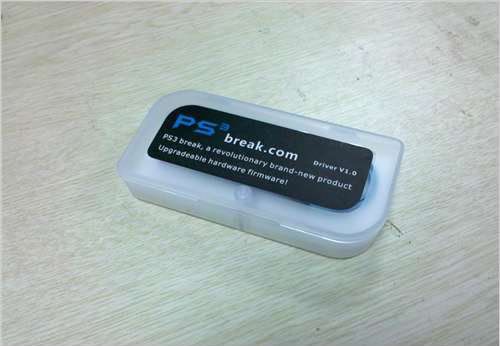
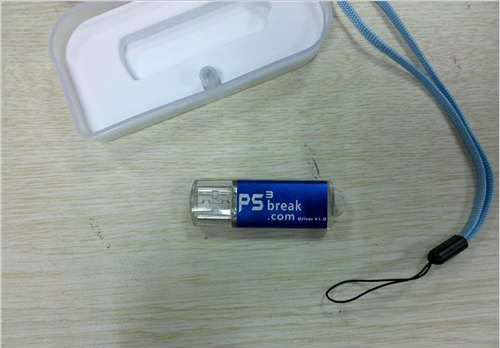
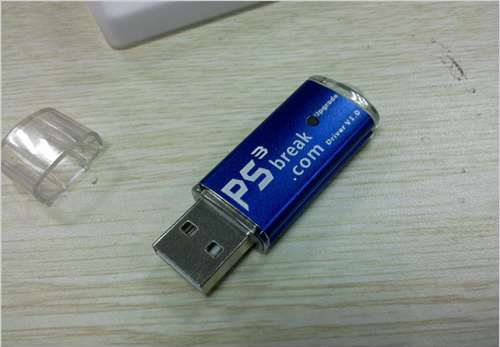
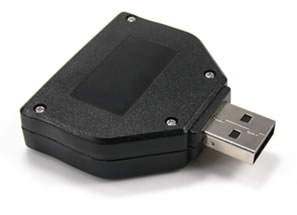
The contents of the package are contained in the normal clear plastic tray. These are as follows:- The M3i Zero card, which is housed in a plastic case with space for your MicroSD card. This is very much like the cases you get with memory cards such as Kingston/Sandisk, a tiny black/blue "Sandisk-esk" USB 2.o reader, emblazoned with a white M3 logo. Unfortunately the USB reader only shares the looks of the Sandisk reader and not the build quality. Its serviceable, but I would always recommend buying a decent "branded" reader if you want to steer clear of the dastardly blight, known as data corruption.
 |
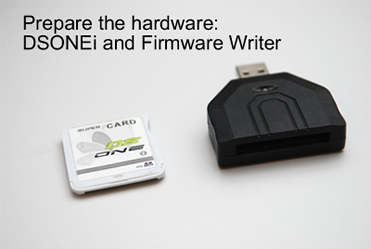
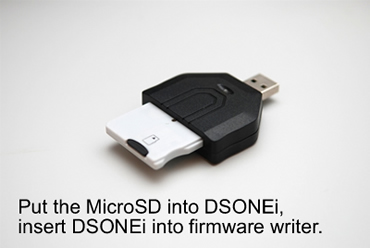
The final item in the box is the all important firmware power supply cable. This is an intriguing piece of kit. Unlike the Supercard DSONEi solution. The M3 team have gone for a completely different form factor in regards to powering the flash card via USB. Rather than the whole card sitting in a slot 1 adapter. They have gone for a much sleeker yet fragile design. At one end of the power cable is a rigid ribbon cable, much like the kind that connects the DS touchscreen to the motherboard. This inserts into the side of the M3i Zero card. Powering the card during the flash process.
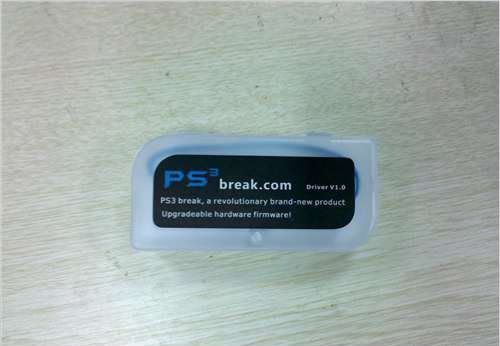
Build quality.The M3i Zero comes in a black shell. The grade of plastic feels on par with the Acekard 2.1. Its not quite on par with the previous M3 Real construction, which felt solid and hefty. The two parts of the shell are held together by a clip design and not the usual sealed/mini screws. There is a noticeable IC bulge on the label side of the card. The label itself is a glossy blue/white design with a yellow/white M3 Zero logo. The label had been placed squarely on the card.
The card's "copper teeth" are not protected by the usual raised fins. The PCB is green. The microSD slot is situated on the side of card. The spring has a fairly positive action and click. The populated card slot is flush with the top of the shell. Inserting the card into my DSi was no trouble. The IC bulge didn't cause any problems by scraping the sides of my well worn slot 1.
On the whole, I was happy with the general construction of the card. It's certainly not built like a tank but it's not crap R4 clone territory.
Installation.The M3i Zero ships as a blank card. Devoid of any firmware. Here's the blurb from the good M3 folks.
M3 product does not contain any copyright data or firmware program, though users may upgrade the software to make M3i Zero become the most powerful flash cart.
This is a very clever bit of chicanery by the M3 dewds. I presume this might aid the card's transit through some countries over zealous customs checks.
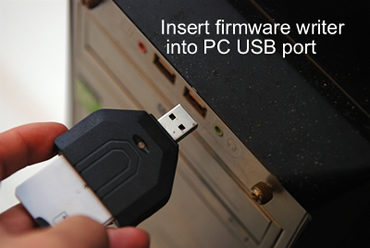
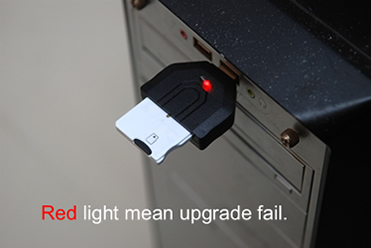
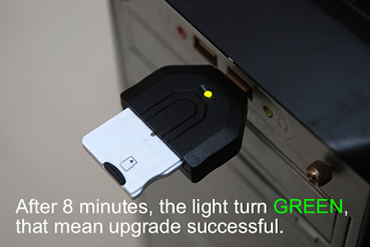
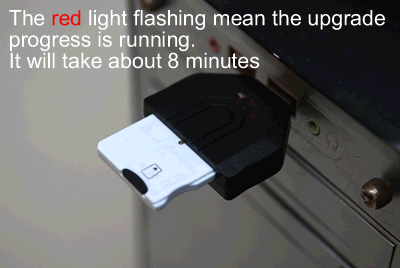
So in order to get the beast up and running, we have to flash the card's firmware with the included USB power cable. At first glance this looked like a tricky endeavour for somebody as cack handed as me. The rigid ribbon cable end of the power lead looks fragile due to its wafer thin design. But alas my fears were allayed, as it was pretty easy to insert the power cable into the side of the card. Following the readme instructions, I copied the latest system software to the root of my freshly formatted memory card, along with the firmware dat file. I then attached the power cable to my PC's USB hub. Immediately a red led started flashing within the M3i Zero's card housing. After 10-15 seconds, the led stopped and I unhooked all the various cable from the card. I hurriedly popped the card into my DSi and fired the blighter up. Hey Presto! I was greeted by a M3 logo on the menu screen. Sweet! A painless installation.
 |
I did the patented fire up the card without any Micro SD card test and the old delete a few system files test. The M3i Zero passed with flying colours, displaying the right error codes for each test.
 GUI.
GUI.During this section of the review I am going to focus on the Sakura OS. A detailed overview of the TouchPod OS and its homebrew capabilities can be found in my previous review of the M3 Real.
http://www.radio-ninty.com/SMF/index.php?topic=133.0When you first boot up the M3i Zero you are confronted by the new dual boot menu. Offering you the choice between the old Touch Pod OS and the new Snazzy M3 Sakura software. You can either use the touch screen or dpad+ A button, to select your option.
M3 Sakura executes a disk check of your memory card to make sure all is well on first boot. On my 4gig card this took only a few seconds. Next we are greeted with startup settings menu.
The first option is the language setting, choose from the following:- English, Deutsch, Espanol, Dutch, Francais, Italiano, Protugues
and Russian!!
Next up is the Line mode which enables either 1 or 2 line support for long file names. I went for the 1 line option as its looks slicker and enables more files per screen. Great, if your memory card is chocka block with loads of apps/games.
Lastly, you have three check boxes which are fairly self explanatory.
1.Always run DiskCheck on boot.[on/off]
2.Enable sound effects [on/off]
3. Don't show this screen[startup settings] next time.
Once you have sorted your config, you click the "OK' box to confirm all your choices and then you are dumped to the main file browser of M3 sakura. The good thing is that you don't need any manual to get going. The top screen immediately displays all the various button combos, to aid your navigation of the GUI.
The first thing that hits you once you start playing around with Sakura, is how silky smooth the scrolling is. The default skin has a fantastic yet stylish simplicity. It really puts other flash card GUI's in the shade. Anybody that has used the Moonshell 2 multimedia application, will feel right at home. File browsing uses both screens to display your folders and files. To run a binary, either slide stylus to the right over the file name or press the A button. Slide left or press the Y button to enter the settings menu for the highlighted file. You can navigate through nested folders using the same touch n slide actions. Its all very well thought out and intuitive.
Unlike some other GUI's that I have tested, I encountered no file sort issues and or locks up due to max files fresholds on the card root. Even with a 4gig card full of homebrew, the OS performance was a pleasure to use.
System Menu.Pressing the Start button brings up the system menu. Here you can change the following options.
1/2 line mode toggle.[ This changes between big/small icons/text for files. 1 line mode displays 11 files/folders per screen. that's 22 in total. 2 line mode displays 6 large icons and also allows for large file names to "wordwrap" to the second line.
GUI Settings
This option brings up a raft of control settings tick boxes to tweak the interface to your own taste.
Don't show Initial Setup on boot
Always run DiskCheck when booting
Enable sound effects.
Enable fade transition effect
Start Sakura from Recent Files list
Lock folder navigation. This is a very useful feature if you have kids and want them only to use apps/games in a specific folder. Navigate to the folder you want to use and then enable this option. Reboot and Sakura will start up in that folder. A beep will sound if you press B or touch the folder navigation button. Obviously this feature can be disabled using the start button but for small children it might cure some of the "you just reset my high score save" arguments.
Hide filename extensions
Hide unsupported files
Use dark background screen saver
Enable FastStart movie playback
Lock L/R during music playback
Restore default wallpaper
Language settings
English, Deutsch, Espanol, Dutch, Francais, Italiano, Protugues
and Russian!!
Save file restore menu [only when a game is highlighted]
Recent Files ListPressing select brings up the recent files list. As Stu would say, the clue is in the title. This shows the last 5 apps or games you have run on the card. This is a great time saver, if your card is awash with many nested folders and files. There is also a separate tab called accessories, which has a couple of preloaded applications. These are CheckDisk and Morning Timer. A further 3 apps can be added to this tab by manually installing .nds binaries to the SYSTEM\m3sakura\launch\ folder.
MultimediaAll the following Multimedia function can be accessed right from the file browser. You don't have the load a separate app in order to read an ebook, watch a film or listen to some music. With past versions of flash cards built on the moonshell 1 code base, this has added greatly to an increased initial boot time. Not so with Sakura, which is built upon the new moonshell 2 code. The boot up time was pretty satisfactory even on a heavily fragmented 4gig card.
Movie Player.The M3i Zero supports the moonshell DPG movie format. I threw a few different sized movie clips at the player and they all worked as expected. By pressing the select button you can cycle through the viewing modes[top screen,bottom screen, both screens and both screens with the top screen rotated 180 degrees. The default is both screens. All the rest of the controls function much like moonshell 2. By tapping the bottom screen you access the video transport GUI. Clicking the movie strip icon in the lower left displays a detailed description of the DPG including encoding info and frame rate etc.
Music Player.Native mp3 support comes as standard. Its as easy as navigating to your file and pressing A to play your tunes. Alternatively you can double tap with the stylus. A Mini music control bar can be displayed by sliding the stylus left over the file or by using the L+dpad left. You can then navigate out of the folder and still have control over your music by tapping on the previous/next track/pause/play/repeat mode icons. Embedded ID3 tag info is displayed on the top screen.
Text viewer.Pressing select whist viewing a .txt file brings up the display mode menu where you can tweak the following settings
enable dual-screen mode
use dark background screen saver
font size [small, medium, large]
code page [cp437, cp850, cp1252]
Auto-Detect Encoding
ASNI[8bit ASCII]
Japanese S-JIS
UTF-16 Big Endian
UTF-16 Little Endian
UTF-8
Pressing X brings up the save bookmark menu where you can store upto 4 save points. Very handy if you have snaffled a rather large RPG FAQ document off the tubes. Pressing Y brings up the bookmark load menu screen.
Image viewing.The basic controls are shown on the top screen. You can zoom to 50%,200% and 100% by using Y,X and A buttons, or by tapping on the zoom icon in the lower left hand corner of the bottom screen.
Pressing select or tapping on the lower right icon, brings up the image display mode settings menu, where you can faff around with the following options,
Show file info and help
Show zoom/control icons
Increase button sensitivity
Increase touch screen sensitivity
Remember zoom
Auto-fit large JPEGs.
The next three settings alter the wallpaper image feature. This is a simple way of personalising the GUI for people without photoshop/skinning skills.
Account for gap between screens
Apply transparency to top screen
Apply transparency to bottom screen
Pressing the start converts the current image to the GUI wallpaper/background image. This is made all the more impressive by the fact that the current zoomed area shown on the bottom screen is captured. Auto cropping the original picture. This is great if you have a huge JPEG image and want to use only a portion of the photo.
Game Features.Much like the M3 real, the M3i Zero has a good suite of features that many gamers crave. The Sakura OS performs exactly like the dual boot alternative TouchPod OS.
Game file settings menu can be accessed by sliding the stylus left over the highlighted game or by pressing the Y button. You now have quite a few options including; soft reset, cheats, real time save and download play. By the side of each option, the hotkey combo is displayed. This a great idea, no more checking readme.txt or web site FAQ's. Not only do you get a hotkey but you get a choice of two key configs. This is handy if the game you are playing might clash with a particular set. Very cool. The cheat option not uses in the firmware database but also supports individual cheat files. These can be xml, cht, dht or dat-R4 formats.
The real time save option works exactly like the M3 real. You get 3 RTS slots per game. The menu is clear and easy to navigate. Saving/loading take about 4 seconds and progress is shown by a percentage scale in the bottom left hand corner of the screen. The save states are roughly 4.9megs in size.
Game save file support can be accessed by highlighting the game and pressing the start button and selecting the save file restore menu. This works in much the same way as MS Windows system restore. Each save file can have upto 8 slots which are time stamped. To restore to a previous save, highlight the appropriate date/time file and press L+A button combo. Very slick.
I tried all the various game options on a number of titles. They all worked as intended. Performance was on par with the M3 Real. Loading times were quick and the RTS performed solidly.
Skin Support.All Sakura skins use the .skn format. This is a single file pakage. This is a very tidy solution when dealing with the many image files that make up a complete skin. To change the GUI skin/theme is simplicity itself. Simply click on the filename.skn and the theme is instantly loaded. You can swap and change them on the fly, till you find one that's your cup of tea. If you would like to create your own there are a couple of applications to make the process easier.
M3 Sakura SkinMake Skin Generator
http://www.linfoxdomain.com/nintendo/ds/dl.php/M3Sakura_SkinMake_v0.3.zipM3 Sakura Skin Tester coded by gatsu80
http://www.megaupload.com/?d=OXGEL8LMSakura Video Player Skin Template created by Aguilera_87
http://www.megaupload.com/?d=SUU06RGKHomebrew Testing.Just like many of the recent cards I have reviewed, the M3i Zero has built in AUTO-DLDI patching.
Test systemDSi Console [1.3j firmware]
M3i Zero Slot 1 card
M3 Sakura v1.40 x08[Euro/USA] with bundled TouchPod v4.3f
F_Core.dat 08/07.09
M3 MicroSD USB reader
Kingston [Japan] 4gig class 4 MicroSDHC
Sandisk 2gig MicroSD
Kingston [Japan] 1gig MicroSD
Due to the dual-boot OS feature I have only tested a select few homebrew apps/games using M3 Sakura. Touch Pod can already run vast array of titles and these can be found in my previous review of the
M3 RealAll the following work and boot up. Obviously there are some apps/games I have tested more rigorously than others.
Quake
Cquake
DSDoom
Duke3DS
Rise of the Triad
Lemmings
Still alive
Word up
Pocket Physics
Puzl
ZXDS
Lameboy
NESDS
JEnesisDS
ComicBookDS
NitroTracker
BlipTracker
Whilst testing my favourite homebrews, I noticed a number of corrupted icons for old palib games and even cquake. This didn't affect them running as normal but looked garish and out of place, within the very snazzy looking Sakura interface.
Useful links.M3i Zero firmware data file V1.0
http://down.gbalpha.com/GBalpha/Softwares/F_CORE.zipM3i Zero firmware Upgrade Manual PDF.
http://www.handheldsources.com/M3DS/Readme/m3i_upgrade_manual1.pdfM3Sakura Ver1.40 X Europe/USA Version
http://down.gbalpha.com/GBalpha/Softwares/M3Sakura_Ver_140x_EUR.zipPros.Dual Boot OS
Official Sakura Support
Fantastic hardcore gaming functionality
Superb multimedia functionality
Updatable kernel, boot flash and firmware
Decent hardware quality
SDHC support
Glossy label
Good homebrew compatibility
Cons.No basic file management[cut/copy/paste/delete] in Sakura OS
No software/documentation included in package.
Not 100% homebrew compatible
Poor official web site design
Offsite OS downloads
Summary.Team M3 seemed to have acted on my comments regarding the M3 Real and introduced them to the M3i Zero. They have brought the superb Sakura GUI to the western market. Not only that, but they had also introduced the first official dual boot system for any flash card. This adds to the power of the device by maintaining good compatibility whilst pushing ahead with the Sakura codebase through software updates. The ability to update the kernel, boot flash and firmware only adds to the mix. This increases the longevity of the card.
The M3i Zero offers the best suite of features, both in hardware/software, currently available for any homebrew enthusiast. This card is now my current weapon of choice for the DSi. This is the best endorsement I can give any DS flash card.
source from : http://www.radio-ninty.com/SMF/index.php?topic=193.0